Avoid Common Mistakes in Drywall Installation
Master Drywall Installation: Avoid Common Mistakes for a Flawless Finish
Drywall installation may seem like a straightforward task, but it involves careful planning, precise measurements, and attention to detail. Whether you're a DIY enthusiast or a homeowner relying on local drywall companies, avoiding common mistakes during the installation process is crucial for achieving professional-looking results.
Drywall, also known as sheetrock, plays a pivotal role in providing structure and durability to the interior walls of any building. However, without proper guidance, even small errors can lead to significant issues like uneven surfaces, cracks, or loose installations. I
Here, we’ll walk you through the common mistakes made in drywall and sheetrock installation and how to avoid them. Additionally, we will provide a
Drywall Installation Step by Step Guide to help you understand the correct process from start to finish.
1. Incorrect Measurements
One of the most frequent errors during drywall installation is inaccurate measurements. This can lead to gaps between the drywall sheets or incorrect cuts, causing wasted materials and time. Always measure twice and cut once. When dealing with drywall sheets, ensure that you have precise dimensions for each area. Using a tape measure and chalk lines can help in ensuring accuracy.
Incorrect measurements can cause problems like:
Gaps between drywall and sheetrock joints
Misaligned corners
The need for extra drywall repair due to uneven surfaces
Solution:
Before starting the installation, create a plan with detailed measurements for each wall and ceiling. Use a T-square or a carpenter’s square to maintain straight lines when cutting drywall sheets.
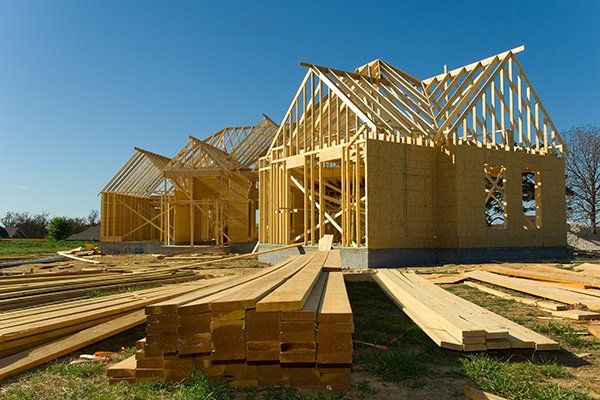
2. Poor Framing Alignment
Even the best drywall contractors can struggle with poorly aligned framing. The structural framework behind your drywall must be level and properly aligned to ensure a smooth installation. If the studs are not evenly spaced or are out of alignment, your drywall will develop problems like bulging or warping over time.
Solution:
Use a level and a stud finder before attaching drywall sheets. Ensure that each stud is placed at the standard 16 or 24 inches apart. If the framing is uneven, take the time to make the necessary adjustments before proceeding.
3. Using the Wrong Type of Drywall
Not all drywall sheets are created equal. For example, drywall that’s used in a bathroom or basement must be moisture-resistant, whereas standard sheetrock is more appropriate for living rooms or bedrooms. Failing to use the correct type of drywall can lead to long-term issues, especially in areas prone to dampness.
Solution:
Understand the different types of drywall available:
Standard drywall for general areas
Moisture-resistant drywall for bathrooms, kitchens, and basements
Fire-resistant drywall for garages or utility rooms
Local drywall companies often provide free consultations to help determine the best type of drywall for your project.
4. Failing to Secure the Drywall Properly
Securing drywall sheets properly is essential for ensuring that your walls remain stable and free from movement or vibrations. Some people use the wrong screws, don’t use enough fasteners, or space the screws incorrectly, causing issues later on.
Solution:
Ensure that screws are placed every 12 to 16 inches along the studs and edges of the drywall sheets. Drywall screws should be long enough to penetrate the drywall and sink into the stud behind it. Avoid over-tightening the screws, as this can cause the drywall to crack.
You're right! Let me revise that part for a more natural fit:
5. Skipping the Use of Joint Compound
One of the most critical stages of drywall installation is applying joint compound, also known as mudding, to the seams between drywall sheets. Skipping this step or applying it unevenly can result in visible seams and imperfections on your walls. If this stage seems overwhelming or you're not confident in your technique, many drywall contractors near you will offer free estimates and can help ensure this part of the process is handled professionally.
6. Not Using Tape on Seams
Failing to use tape on the seams between drywall sheets is another common mistake. This can result in cracks forming along the seams over time.
Solution:
Apply drywall tape along all seams before applying the joint compound. Paper tape works well for most applications, but fiberglass mesh tape is an excellent alternative for high-moisture areas. Be sure to smooth out the tape to prevent air bubbles or bumps.
7. Ignoring Soundproofing and Insulation
When installing drywall, especially in shared spaces or between rooms in residential areas, soundproofing is often overlooked. Insufficient insulation can lead to noise transfer, making your home less peaceful.
Solution:
Consider installing soundproof drywall or adding soundproof insulation between the studs before attaching the drywall sheets. This extra step can make a significant difference in the overall comfort and tranquility of your home.
8. Inadequate Support for Heavy Items
If you plan to hang heavy objects, like shelves or televisions, on your drywall, failing to provide adequate support during installation is a common mistake. Drywall by itself isn’t strong enough to support heavy items without the proper backing.
Solution:
Before installing the sheetrock, ensure there is adequate blocking or reinforcement in the wall for the areas where you plan to mount heavy items. This can be done by adding extra studs or plywood backing behind the drywall.
9. Forgetting to Sand Between Coats of Joint Compound
Skipping the sanding step between coats of joint compound can leave visible imperfections that become more apparent after painting.
Solution:
Use fine-grit sandpaper to smooth the surface after each coat of joint compound. Sanding between coats ensures a professional finish that’s free from ridges or bumps. Once the surface is smooth, you're ready to prime and paint.
10. Not Hiring Professional Help
While many people try to install drywall themselves, some projects are best left to professional sheetrock contractors. Poor installation can lead to costly repairs and may even affect the structural integrity of your walls.
Solution:
Hiring residential drywall contractors or drywall contractors in Fort Worth ensures that your drywall is installed correctly the first time. Many local drywall companies offer free estimates, making it easier to find the right contractor for your needs.
Drywall Installation Step by Step Guide
Here is a brief Drywall Installation Step by Step Guide to help you avoid common mistakes and complete the installation correctly:
Prepare the Area: Remove old drywall, if necessary, and make sure the framing is properly aligned and leveled.
Measure the Area: Measure the dimensions of your walls and ceilings twice to ensure accuracy before cutting the drywall sheets.
Cut the Drywall: Use a utility knife and a T-square to make clean cuts on your drywall. Make sure to cut around outlets and other fixtures.
Install the Drywall: Starting from the ceiling, screw the drywall sheets into the studs. Ensure screws are spaced evenly for proper support.
Tape and Mud the Seams: Apply joint tape over the seams and cover it with joint compound. Apply 2-3 coats of joint compound, sanding between each coat.
Sand and Finish: Sand the joint compound until smooth, ensuring there are no visible seams. Wipe down the walls before priming and painting.
Following this step-by-step guide will help you avoid the common pitfalls that occur during drywall installation and ensure your project goes smoothly.
Conclusion
Drywall installation requires careful planning, attention to detail, and the right materials. By avoiding these common mistakes and following our Drywall Installation Step by Step Guide, you can achieve a smooth and professional-looking finish. If you’re unsure about any stage of the process, consider reaching out to local drywall companies for assistance. Whether you're tackling a DIY project or hiring drywall contractors near you with free estimates, taking the time to do it right will save you from future headaches.
Ready to work with Fort Worth Drywall Contractor Services?
Let's connect! We’re here to help.
Send us a message and we’ll be in touch.
Or give us a call today at 111-222-3333
Agency Contact Form
More Marketing Tips, Tricks & Tools


©Fort Worth Drywall Contractor Services
Get In Touch
© 2004 | Powered by UpShot